
We all know that photos are an essential part of any outdoor trip such as hiking. We all want to capture those delightful moments and the things we discovered along the way as happy memories which we can then share with friends and families, Instagram, Facebook and whatever. Besides, pictures let us boast about our adventurous trips as achievements among our tribe for more acceptances.
So yes, photography is a very special part of your outdoor trip and you have every reason to be excited about it and having good pictures is essential then. But have you ever wondered how to enhance your photography experience even when you have bought the best camera and related equipment on the market?
Buying the most expensive camera and equipment or making wallet draining upgrades is not always the answer to this problem. Of course, everything takes time and practice. So if you are considering those heavy upgrades, we suggest that you try out the techniques below to make your photography experience and photos, better.
So these are the 17 outdoor photography tips for beginner photographers.
1. Do your research

No matter which photography guide you pick up, the first piece of advice you will find is that you do your research. This cannot be emphasized more. You should know the habitat of where you are going and what to expect. What kind of shots you would be taking which will determine the kind of equipment you would be using. So it is always essential to do your research.
You can start by studying other photographers work, their angles, their positioning. This is not to say that you copy them. Studying their work will let you have an idea of how to frame your shot when you arrive at the location. You can then think of ways of making those shots better. Flickr is a good tool to start for finding pictures.
Another way is to make shot lists. This lets you set the target for how many shots you need to tell your story of the place. You can review the list in the evening at your camp and get an idea of how many shots you still need to get.
2. Silence is essential

Wildlife is sensitive to human presence and most importantly, to noise. To them, noise means danger. They even make noise themselves to warn for danger. So you need to literally SHUT UP! Apologies if that sounded rude, but there is no better way to put it. You need to be as quiet and as low profile as you can be. As a wise man once said, “Mastering the art of staying so still that you become invisible” (A Drax reference from Avengers Infinity Wars.
But anyways, silence is essential overall for a good photography experience. Silence helps you focus and look around more so that you get some great shots. No one can be a good photographer while being a hooligan. So close your mouth, go low profile and take steps carefully.
3. Camera at the ready

While you would like to show off your fancy camera case, you are suggested to keep your camera out all times while you are out. Events in nature are often instantaneous and so they won’t give you enough time to take off your backpack, dig your camera out, turn it on and then wait for it to turn on. There goes your opportunity for a good shot. So keep the camera out and at the ready. Mirrorless cameras are great for outdoor photography as they are compact and lightweight.
4. Perfect light doesn’t exist

The hours around sunset and sunrise make for some impressive shots, hence, called the golden hours. But the reality is, you will on the trail for the most part in the middle of the day. So you will have to adjust to it. Even if the lighting conditions aren’t right, take the shot anyway as you might not get the chance again.
5. Capture action instead of candid

Candid shots are great, but they do not always get you the photo you want. Instead, you and your buddies can take action shots in which you all can pose for an action. Action shots are all about positioning and angle. As an example, you can go low and have your buddies walk through the shot making the viewer feel as if they are walking in the picture allowing them to see the outdoor photographer profile in action rather than just their backs.
6. Never pass the opportunity

During your trip, you should try to avail every opportunity you can find. Now you might tell yourself that something is not worth it or that you might do it later, but you never know. You might find that shot to be better than you expect it to be or that you might choose a different path on your way back or the lighting conditions might change. So don’t pass the opportunities to take these shots. Plan your routes to be around places which provide the most opportunity for good photography. Don’t be afraid to take detours as well. Go out of the way if you have to and if you can do it safely. Some of your best shots are always unplanned.
7. Don’t be obvious

Make sure you don’t limit your portfolio by confining yourself to a particular area. Wandering in new areas can expand your portfolio with shots that stand out. Careful planning can help you come back with more than you need for your portfolio. You will also make some memories that will last for a lifetime.
8. Start early in the morning

Getting out of bed from a warm bed is tough but it’s worth it. Set your alarm half an hour the sunrise and get ready with your camera to snap those orange and red hues of the first light of the day and as the sun rises in the sky coming up from behind the mountains.
9. Stay up late night

Now they say going early to bed is good for health. But this is not true when you are on an outdoor hiking trip. Hiking trips offer you a great opportunity as the night falls. The dark sky lights up with stars and nebulas which is a spectacle in itself giving you not only a good opportunity for photography but also a great experience for your hiking. But a sky full of stars is not the only reason for staying up late. Hiking near an active volcano is reason enough. The night time offers the most stunning scenes for photography for this reason.
10. Photography-friendly guide

Guides mostly assume that you and your group climb the mountain as soon as possible. That doesn’t work when you are looking to make some exceptional shots. Photographers need to wander around and take their time for those perfect time and the perfect shot. Make sure you hire a guide who works well with photographers and have the patience to make frequent stops for a better experience.
11. Have a unique touch

Natural scenes are prevalent. You must develop an eye for noticing situations that will let you take unique pictures. Use the “leading lines” and “the rule of thirds” for taking photos making your portfolio out of the ordinary and even get you noticed. Take unique photos that develop the interest of the viewer.
12. Find you foreground

Everyone is shooting at the same location and it can be discouraging if you’re looking to create something unique. The great way to capture something unique is to find your own perspective using the foreground. A good foreground provides a point for the viewer’s eye to enter the image and creates a sense of depth. So ask yourself “How can I lead my viewer through the image?” Then go get close, get low, change your perspective, change the height of the tripod if you’re using one. Reflections, shapes, lines can all be used to draw the viewer’s eye through the scene. If there aren’t many interesting elements, one option can be the human form which brings us to the next tip.
13. Add a sense of scale

With natural elements like trees, mountains and lakes it’s often hard to tell how large or small everything really is. Of course, this can be further exaggerated as an effective way to make an abstract image. But for more traditional landscape scenes, it usually helps to add a sense of scale and a great way to do that is with the human form. Not only that but a person in the scene often acts as a focal point and can help the viewer connect more deeply with the experience of being there. Subjects might include a person such as yourself or your adventure buddy or your own legs, a physical object such as a tent, kayak or hammock or any other number of things.
14. Watch your contrast

Getting the perfect contrast for a landscape shot can sometimes be difficult. When shooting a landscape it’s important to have in mind the end result that you wish to obtain. You also need to determine whether the current contrast in the scene is high or low as the shooting techniques will be different for either. Contrast is a tricky thing to get right in a landscape shot. Making a conscious decision before shooting, on how you wish the contrast to look will make your life much easier.
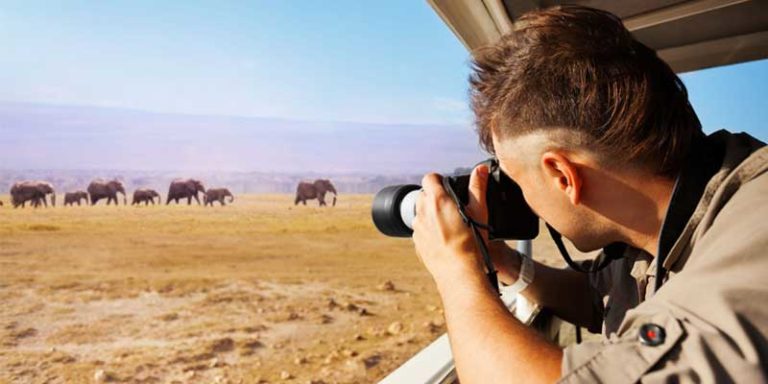
15. Bring a telephoto

Here I’m referring to lenses with a focal length 200 millimeters or longer, more preferably more than 300 mm. Most people already know about the importance of having a wide-angle lens to capture the expansiveness in one frame. You’ve seen those shots with flowers in the foreground sweeping middle-ground with the mountains in the back, but one of the best things about those expansive views is the telephoto’s ability to reach out and grab a snippet from the landscape to focus on. This can be especially useful in inclement weather or if you’re not at the scene during prime lighting conditions, where using a wide-angle would result in too much contrast in the scene.
16. Always carry extra batteries

If you’re shooting in the outdoors, you’d better have at least one extra battery for every camera that you own especially if you do any cold weather photography because cold weather can reduce battery life. It really has a negative effect on the efficiency of batteries. When you go out into the snow, always keep your batteries in your chest pocket so they get the warmth of your body. It’ll give you a much better battery life in cold weather.
17. Choose your gear wisely

This is the most important point. You need to choose your gear wisely. You may or may not care about the budget when it comes to your photography gear, but the most important factor is weight. When going on long outdoor trips, weight matters. In fact, this single factor is enough to turn a good hiking experience into a bad one instantly. You wouldn’t want unnecessary weight hanging on your back while you walk for miles on a sunny day or any day for that matter.
Remember about doing your research earlier? Yes, this is where to use it most importantly. Doing your research will help you choose the lightest photography kit that you can.
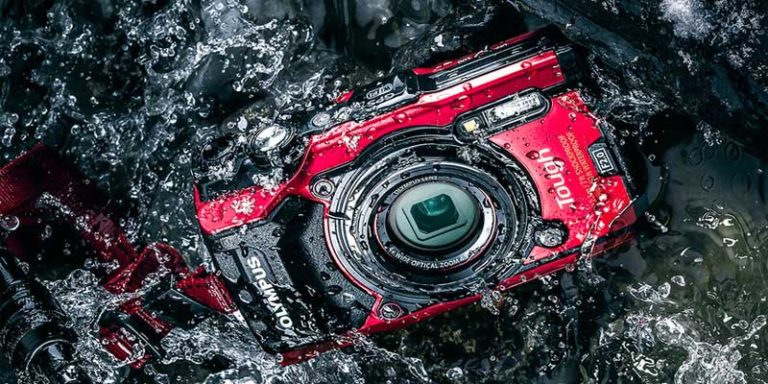
Rugged cameras like the Olympus Tough TG-5 are great for underwater photography and mountain climbing leaving less to worry about damaging your camera. The rugged cameras are expensive though.
Point-and-shoot cameras are a great option for the budget but lack the zoom. Sony RX100 is a good option for almost $450 but unlike the RX100 V lacks 4K video, Wi-Fi, electronic viewfinder and some other options that cost almost $1000. Other option includes Ricoh GR II with a huge sensor but has a fixed focal point lens.
Mirrorless cameras have the same image quality as a DSLR but are smaller in size and are great for landscape photography. Some of the famous among outdoor photographers are the Sony Alpha A6300, Olympus OM-D E-M5 Mark II, Olympus OM-D E-M10 Mark II, Fujifilm X-T2 and a lightweight version the Fujifilm X-T20.
Then there is the full range of DSLR cameras.
Lens selection requires that you consider the listed zoom range, but for hiking, larger sensors are preferable. Make sure to find something of the 35 mm equivalent. Moreover, also consider taking monopod. It adds to weight but helps you get some excellent, steady shots. But these are suggestions. Of course, as technology progresses, there will be new products in the market that you can buy.
In the end, many photographers have snapped photos of mountains and landscapes. But your job is to make your work unique. You are to take leverage of shadows and reflections to make your photos all the more interesting; make your viewer indulge in what you see and how you see it. As a photographer, chances are that you already have an eye for the unique. Hiking simply gives you a new ground to cover with something different at every step.