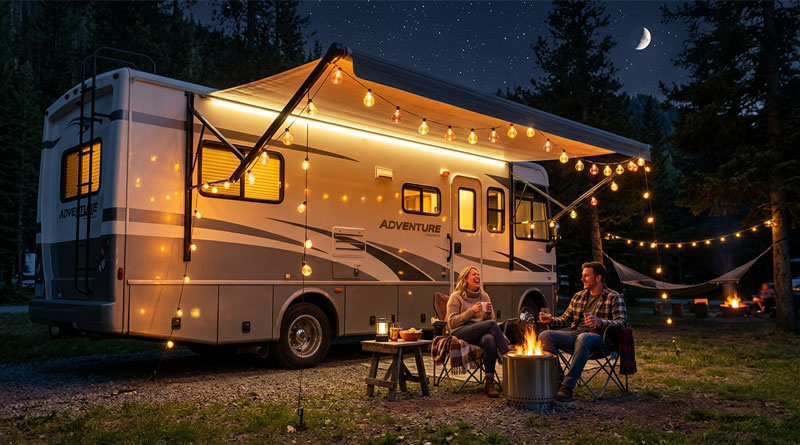
Forget fumbling around your campsite after dark — the right awning lights turn your RV’s outdoor space from a shadowy afterthought into the neighborhood’s best patio. Whether you’re hosting a tailgate, reading in a camp chair, or just trying not to trip over your own gear, lighting matters more than most campers realize. Here’s a no-nonsense breakdown of the best options on the market, plus everything you need to know before buying.
1. Solera RV Awning Fabric White LED Light Kit

- Compatibility: Solera awning fabric with integrated lighting cords
- Awning Sizes: 10’–15′ (cut-to-fit)
- Light Type: White LED on flexible black plastic strip
- Features: Integrated cord, visible extended or retracted, includes switch and plate
If your RV runs a Solera Universal awning with an integrated lighting cord, this kit was basically made for you — and the installation reflects that. There’s no adhesive wrestling or wire-chasing involved; you simply slide the flexible LED strip onto the existing cord and you’re done. The lights stay visible whether the awning is fully stretched out for a campfire night or tucked away for highway miles.
Sizing flexibility is a genuine plus here. The strip is trimmable across the 10–15 foot range, so you’re not left with a dangling tail of unused light. The bundled switch and mounting plate round out a surprisingly tidy package for the price. The catch? This only works with Solera awnings that have that specific integrated cord — and it’s white light only, no mood-setting color options.
- Pros:
- Slide-on install — no tools, no adhesive
- Trim-to-length for a clean finish
- Genuinely budget-friendly
- Cons:
- Solera integrated-cord awnings only
- No color options beyond white
2. Waybelive 16.4Ft Remote Control RV Awning Lights

- Length: 16.4 ft
- Power: DC 12V
- Color Control: 16 colors, 4 modes, remote (up to 16 ft range)
- Durability: Waterproof protective tubing, impact-resistant
The Waybelive strip is the go-to pick when you want your campsite to actually have personality. Sixteen colors — white, red, blue, green, pink, and more — cycle through four modes (FADE, JUMP, ASYN FADE, ASYN JUMP) via a remote that works from up to 16 feet away. It’s the kind of setup that turns a Tuesday night at a state park into something that feels more like a rooftop bar.
Under the fun exterior is a genuinely durable product. The LED strip rides inside robust protective tubing that handles slams, rain, and general outdoor abuse without complaint. Wiring is simple — connect the male DC plug to your 12V supply — and the included self-adhesive clips and screws handle mounting. The fixed 16.4-foot length won’t be a perfect fit for every awning, and the remote’s range is modest, but neither is a dealbreaker for most setups.
- Pros:
- 16 colors plus four dynamic modes
- Tough protective tubing handles impact and rain
- Clips and screws included — no separate hardware run needed
- Cons:
- Fixed length — no trimming option
- Remote range tops out at 16 feet
3. ShadePro Premium Universal LED Awning Lighting System

- Light Type: Weatherproof LED
- Installation: 45-degree track with 3M adhesive, four sections with alignment guides
- Sizes: 10′, 13′, 15′, 17′, 19′ (cuttable)
- Compatibility: Universal — campers, trailers, motorhomes
ShadePro has been in the awning business for over four decades, and this lighting system carries that institutional knowledge into its design. The track mounts at a precise 45-degree angle using 3M adhesive, with alignment guides on each of the four sections that make it easy to keep everything straight. Once the track is down, the LED strip slides in cleanly — no improvising required.
Five size options (10 through 19 feet, all trimmable) mean this system genuinely fits a wide range of rigs without awkward gaps or overhangs. The weatherproof construction holds up in the conditions you’d actually camp in. The only real friction is the four-section track assembly, which takes a bit of patience to align well, and the adhesive demands a spotless surface to get full grip.
- Pros:
- Weatherproof LEDs with solid output
- Five size options, all trimmable
- Works across camper, trailer, and motorhome awnings
- Cons:
- Four-track sections require careful alignment
- 3M adhesive is surface-prep sensitive
4. Carefree Universal White LED Awning Light Strip

- Length: 16′ with 26″ lead (trimmable)
- Compatibility: Universal — fits most major awning brands
- Installation: 3M adhesive-backed, includes butt splice connectors
- Light Type: White LED, 30 LEDs per meter
Carefree of Colorado has been outfitting RVs for decades, and this replacement strip reflects that experience in the details. The 16-foot length comes with a generous 26-inch lead for wiring flexibility, and critically, it skips the proprietary slot-in design — meaning it works with most major awning brands without modification. Butt splice connectors are included, making wiring into your existing system or a competitor’s setup straightforward even for non-electricians.
The 3M adhesive backing handles mounting without specialized tools, and the strip trims cleanly to whatever your awning actually measures. At 30 LEDs per meter, light output is consistent and even across the run. It’s unambiguously a white-light-only product — no color modes, no remote — but for straightforward, reliable illumination from a trusted brand, it punches well above its price point.
- Pros:
- Works with most major awning brands — no proprietary slot needed
- Adhesive backing with clean DIY install
- Trimmable to precise custom lengths
- Cons:
- White light only
- Adhesive performance depends heavily on surface prep
5. RecPro 16′ LED Awning Party Light with Mounting Channel

- Length: 16′ (5m)
- Light Output: 1500 lumens, 4500K natural white
- Power: 12V DC direct wire (power supply not included)
- Mounting: Four 4-foot polycarbonate channel sections
The “party light” label isn’t just marketing — 1500 lumens at 4500K natural white is genuinely bright, the kind of output that makes the space under your awning feel like an actual room rather than a dimly lit afterthought. The polycarbonate mounting channel (four 4-foot sections) sets this apart from adhesive-only strips; it’s a more permanent, more professional-looking install that holds up to the vibration and jostling of regular travel.
Direct 12V DC wiring means this taps cleanly into your RV’s existing electrical system for consistent, battery-reliable power. The tradeoff is that you need some comfort with wiring — this isn’t a plug-and-play situation — and the 110V-to-12V adapter is sold separately if you need one. For campers who want the brightest white light available in a solidly mounted package, the RecPro earns its spot.
- Pros:
- 1500-lumen output — legitimately bright
- 4500K natural white is clean and flattering
- Polycarbonate channel provides a permanent, secure mount
- Cons:
- Direct wiring requires electrical confidence
- Power supply not included
6. LATCH.IT V2.1 20-Foot RGB RV Awning LED Light Strip DIY-Kit

- Length: 20′ LED strip (cuttable)
- Light Type: RGB LED, up to 1800 lumens
- Waterproofing: IP68 — silicone tube inside UV-treated polycarbonate channel
- Kit Contents: 20x 1-ft PC channels, VHB tape, waterproof RF controller and remote, 2x 6-ft 12V power adapters, 2x LED strip caps, degreaser wipes
The LATCH.IT V2.1 is the kit that makes everything else feel incomplete by comparison. The 2026-updated package includes not just the 20-foot RGB strip, but 20 individual UV-treated polycarbonate channels, VHB tape, a waterproof RF controller with remote, two power adapters, end caps, and even degreaser wipes for prep. It’s the rare DIY kit that actually anticipates what you’ll need on installation day and includes it.
Durability is where this kit genuinely separates itself. IP68 waterproofing — achieved through a silicone-encased strip inside UV-resistant polycarbonate, with waterproof connectors throughout — means this isn’t just weather-resistant, it’s built to handle full immersion. At 1800 lumens with full RGB control via RF remote, you have both the brightness for functional lighting and the color range for atmosphere. The multi-section channel install requires patient alignment, but the result is a finish that looks factory-fitted.
- Pros:
- The most complete kit on the market — nothing extra to buy
- IP68 waterproofing is the best in class
- Full RGB color plus 1800-lumen brightness with remote dimming
- Cons:
- Requires stable 12V DC power supply
- Multi-section channel alignment takes time to get right
7. QVEVDACAR 16.4FT 12V White RV Awning Strip Lights

- Length: 5m / 16.4ft (cuttable every 3 LEDs)
- Light Type: White LED
- Power: 12V
- Waterproofing: IP65, fully sealed with waterproof glue
The QVEVDACAR is for the camper who wants their awning lit without fuss or frills. Clean white light, solid waterproofing, straightforward install — that’s the entire pitch, and it delivers on all three. The strip flexes easily around corners and cuts every three LEDs along clearly marked points, so dialing in the exact length for your rig takes about two minutes with a pair of scissors.
IP65 protection from a full waterproof-glue coating handles rain and snow reliably, and the 12V operation keeps heat output low enough that you won’t think twice about it near fabric or kids. Self-adhesive tape handles mounting as long as you prep the surface properly — a quick wipe-down with alcohol goes a long way. No color modes, no remote, no extensions — but for a no-drama white light solution that works, this delivers consistent value.
- Pros:
- Self-adhesive tape makes installation quick
- Cuts every 3 LEDs for precise sizing
- IP65 waterproofing handles real outdoor conditions
- Cons:
- White light only — no color options
- Adhesive needs a clean, dry surface
- Cannot be extended beyond 16.4 feet
How to Choose the Right RV Awning Lights
Shopping for awning lights sounds simple until you’re staring down a page of listings with conflicting specs, vague waterproof claims, and prices ranging from impulse-buy to eyebrow-raising. The difference between lights you’ll love for five seasons and lights you’ll be replacing by spring often comes down to a handful of decisions made before you click “add to cart.” Here’s how to make those decisions well.
Start With Why You Actually Need Them
This sounds obvious, but most buyers skip it. Before comparing lumens and IP ratings, spend sixty seconds thinking about how your campsite actually works after dark.
If you’re a practical camper — someone who wants to see the grill grate clearly, not trip over the step, and read without squinting — you need functional brightness. White LEDs in the 1000–1500 lumen range with a natural color temperature (4000K–5000K) will serve you far better than a color-changing strip you’ll leave on white anyway.
If campsite atmosphere is part of the experience for you — if you’re the site everyone walks past and says “nice setup” — then RGB lights with remote control open up a different kind of value. The ability to shift from warm amber to deep blue to something festive depending on the evening’s mood isn’t a gimmick if you’ll actually use it.
If you want both? Look for RGB kits that include a dedicated white LED rather than mixing red, green, and blue to approximate white. Mixed-color white looks noticeably off compared to a true white LED.
Understand Your Power Setup Before Anything Else
The single most common compatibility mistake is buying lights without checking how they’ll be powered. Most RV awning lights run on 12V DC, which draws directly from your house battery bank. That’s usually the right choice — it works whether you’re boondocking or on shore power, doesn’t require an inverter, and integrates cleanly with your existing electrical system.
Some lights — typically indoor-crossover strips — are designed for 110V AC and require shore power or an inverter to run. These aren’t necessarily worse lights, but they’re the wrong choice if you camp off-grid regularly.
A few products use USB power, which works if you have a powered USB port handy but limits you to lower-output strips that won’t throw much light. Battery-operated lights sidestep wiring entirely, which sounds appealing until you’re hunting for AA batteries at 10pm at a campsite store.
The cleanest setup for most RVers is a 12V direct-wire connection — reliable, invisible once installed, and powered by your existing system. If that requires more electrical confidence than you have, adhesive-backed strips with a cigarette lighter adapter offer a workable middle ground.
Know What Waterproof Actually Means
Every outdoor light listing says “waterproof.” They don’t all mean the same thing. The IP (Ingress Protection) rating is the number that actually tells you what you’re getting.
The rating has two digits. The first covers dust protection (mostly irrelevant for lighting discussions). The second covers water resistance, and that’s the one to watch. IP65 protects against low-pressure water jets — heavy rain, a hose running nearby, splashing. That’s adequate for most camping scenarios. IP67 handles temporary submersion up to one meter for 30 minutes. IP68 covers sustained submersion beyond that.
For awning lights that will live outdoors, retract and extend regularly, and get rained on across multiple seasons, IP65 is the minimum worth considering. IP67 or IP68 is meaningfully better if you camp in genuinely wet climates or plan to keep the lights installed year-round.
Pay attention to whether the IP rating covers the connectors and end caps, not just the strip itself. A strip rated IP68 with unprotected connectors will fail at those connection points — a detail that separates well-engineered kits from cheap ones.
Figure Out the Length You Actually Need
Measure your awning before you order. RV awnings range from roughly 10 to 21 feet, and buying a fixed-length 16.4-foot strip for a 14-foot awning means either leaving 2+ feet dangling or looping it back — neither of which looks good.
Trimmable strips solve this cleanly. Most cut at designated points (typically every 2–3 LEDs), and as long as you cut at the right mark, the rest of the strip continues working. The caveat is waterproofing — cutting a sealed strip can compromise its protection at the cut end if you don’t cap it properly. Quality kits include end caps for exactly this reason. Budget strips often don’t mention this at all.
If your awning is longer than 20 feet, check whether the product supports connecting two strips in series. Some controllers handle this natively; others max out at a single strip’s length before voltage drop starts dimming the far end.
Evaluate the Installation Method Honestly
How lights mount to your RV matters almost as much as the lights themselves. There are three main approaches, each with real tradeoffs.
Adhesive-backed strips are the easiest to install. You clean the surface, peel the backing, press and hold. The problem is that RV surfaces — often powder-coated aluminum or painted fiberglass — don’t always bond well with standard adhesives, especially in heat cycles that cause expansion and contraction. Lights installed this way often start peeling at the ends first. Upgrading to VHB (Very High Bond) tape dramatically improves longevity, which is why better kits include it specifically.
Mounting channel systems — where the LED strip slides into a polycarbonate or aluminum channel that’s then adhered or screwed to the surface — provide a more secure and more polished result. The channel protects the strip from physical damage and distributes mounting stress more evenly. Installation takes longer but the result lasts longer too.
Integrated cord systems, like the Solera kit, are the outlier — they work with awning fabrics that already have a cord built in, making installation almost trivially simple. The catch is compatibility: if your awning doesn’t have that cord, this approach isn’t available to you.
Think About Controls Before You Commit
A basic on/off switch is all some people need. But if you’ve ever had to get out of a camp chair to adjust your lights, you know the value of a remote. RF remotes work through walls and don’t require line-of-sight, making them more reliable than IR alternatives. Range matters — 16 feet covers most campsite situations, but 30+ feet gives you more flexibility.
Dimming is underrated. Being able to drop your lights from full brightness down to 20% for a late-night quiet atmosphere is genuinely useful, and not all products include it. Check explicitly — “brightness control” should appear in the specs, not just “on/off.”
App-controlled systems exist and work well when they work, but they add a dependency on your phone’s battery and Bluetooth range. For most campers, a physical remote is more reliable and less annoying.
Read the Included Accessories List Carefully
The difference between a $35 strip and an $80 kit often isn’t the lights themselves — it’s what comes in the box. Mounting clips, end caps, a controller, power adapters, and surface prep wipes can add up to $30–40 in separate purchases if you have to source them yourself. A kit that includes all of these at a higher price point can easily be the better value once you account for what you’d otherwise need to order separately.
Before assuming a lower price is a better deal, list out what’s included and what you’ll need to add. The most complete kits — like the LATCH.IT — are designed so that everything required for a professional-grade install arrives in one box. That’s worth paying for if you want the job done once and done right.
Don’t Skip Surface Preparation
No adhesive — not even industrial VHB tape — performs well on a dirty or oily surface. The number one cause of awning lights peeling off within the first season is skipped prep. Before installing anything adhesive-backed, wipe down the mounting surface with isopropyl alcohol, let it dry completely, and install in temperatures above 50°F when possible. Adhesive cures stronger in warm conditions. The five minutes this takes will extend your light’s lifespan by seasons.
Plan for the Long Haul
RV awning lights take more abuse than most people anticipate — repeated awning deployment and retraction, road vibration, UV exposure, temperature swings, and precipitation across different seasons. Lights that seem fine on day one often show their quality (or lack of it) after six months of actual use.
UV-stabilized materials in the housing and channel matter more than they’re given credit for. Cheaper plastics yellow and become brittle within a season in full sun. Check specifically for UV-treated or UV-resistant language in the specs. Periodically wipe down the strips to remove grime that can build up and reduce output, inspect connections after long drives, and re-secure any sections showing signs of lifting before they peel entirely. A little maintenance after each trip extends the life of even modest lights significantly.
